
Standing in the center of a home that needs work, it is easy to let your mind drift straight to the exciting parts: choosing dramatic quartz slabs, picking out warm hardwood stains, or deciding on the perfect shade of moody navy for the study. However, taking on a full-scale home overhaul is a massive physical and financial undertaking. When you strip a house down to its bones, you quickly realize that aesthetic choices are only a tiny fraction of the overall equation. The real substance of a successful overhaul lies beneath the surface, hidden behind the drywall and underneath the subfloor.
Rushing into construction without a clear, safety-first roadmap is one of the fastest ways to derail a budget, compromise your health, and create structural headaches that cost tens of thousands of dollars to fix down the road. Every year, eager homeowners jump straight into tearing down walls, only to run into unmapped load-bearing supports, active environmental hazards, or severe water damage that halts work for weeks. Planning a full transformation safely requires patience, detailed sequencing, and a clear understanding of how home systems interact with one another. By taking a phased approach—moving methodically from hazard management to structural weatherproofing, core utility upgrades, and finally custom interior finishes—you protect both your financial investment and the physical safety of everyone involved in the project.
Assessing Environmental Hazards and Securing the Jobsite

Before a single sledgehammer hits a wall, every older residence must undergo a comprehensive environmental and structural assessment. Homes built prior to the late 1970s often hide hazardous materials within their plaster, insulation, vinyl tile flooring, and pipe wrapping. Disturbing these materials without proper containment can release dangerous fibers or toxic dust into the air, circulating contaminants throughout the living spaces and posing severe long-term health risks to your family and site workers.
A thorough site evaluation begins with bringing in certified testing technicians to sample suspect materials across the entire property. If tests confirm the presence of friable materials in the acoustic ceiling tiles or pipe insulation, attempting to remove them yourself or letting a general labor crew tear them out is a recipe for disaster. You must hire specialized experts certified in asbestos abatement to set up negative pressure enclosures, seal off HVAC vents, and safely remove and dispose of the dangerous components according to strict regional environmental regulations. Taking this precautionary step protects the air quality of your neighborhood and gives you a completely clean, non-toxic environment to work in.
Once environmental clearance is secured, the physical clearing of the space can begin. Many homeowners make the mistake of viewing demolition as a fun weekend activity where anyone can swing a mallet. In reality, tearing down interior walls requires a deep understanding of load-bearing pathways, electrical routing, and plumbing stacks. Removing a wall without proper temporary shoring can cause structural sag, cracked plaster on upper levels, or catastrophic structural collapse.
Partnering with an experienced demolition company ensures that structural loads are evaluated, temporary support walls are engineered correctly, and materials are sorted safely. Professional crews know how to systematically disassemble cabinetry, strip wall coverings, and haul away heavy masonry without damaging the underlying subfloor or exterior framing. They also implement rigorous dust management systems, such as zipper doors and air scrubbers, keeping fine debris from settling into areas of the home that are not being renovated.
Fortifying the Exterior Envelope Against the Elements

With the interior cleared and safe to work in, the immediate focus must shift to securing the exterior envelope. There is no point in installing high-end interior finishes, custom cabinetry, or delicate drywall if the outer shell of the house allows moisture to seep in. Water is the absolute enemy of a building’s framing, and establishing a watertight, weatherproof enclosure is an essential prerequisite before moving forward with interior trades.
Managing Drainage and Roof Water Control
- Elevate your attention to rooflines and water diversion systems before touching any interior framing.
- Overflowing water from blocked or damaged gutters can run down exterior walls, leading to rotted rim joists, ruined siding, and compromised foundation footings.
- Integrating a high-quality gutter guard installation during the roof and trim repair phase prevents leaves, pine needles, and debris from clogging downspouts.
- Keeping rainwater flowing away from the foundation wall reduces hydraulic pressure against basement masonry, protecting your lower level from ground-water intrusion.
- Properly sized downspouts and extension channels ensure that volume during heavy rainstorms is directed at least six feet away from the home’s perimeter.
Sealing Structural Openings and Entry Points
Once the roof drainage is flowing away from the building correctly, turn your attention to the structural openings around the building envelope. Old, drafty, or improperly flashed doors and windows are primary access points for wind-driven rain, air leaks, and unwanted pests. During a full-house transformation, existing exterior portals are often shifted, widened, or replaced entirely to improve natural lighting and indoor-outdoor flow.
Focusing on precision during new door installation ensures that the surrounding rough opening is properly flashed with self-adhering membranes, properly shimmed for square alignment, and insulated with low-expansion foam. A correctly sealed exterior door setup does far more than just look attractive; it creates an airtight thermal barrier that prevents moisture penetration and drastically lowers energy loss. Securing these entry points keeps the home climate-controlled during the upcoming interior phases, shielding freshly installed drywall and timber framing from ambient humidity swings.
Overhauling In-Wall Utilities and Mechanical Infrastructure
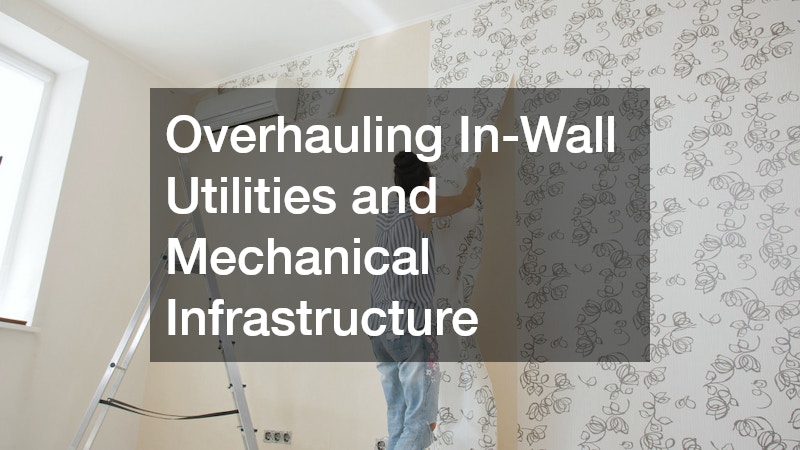
When the house is stripped down to its studs and sealed off from the weather, you are presented with a rare, valuable opportunity: full access to the inner workings of your home. It is during this stage that you must address the critical utility networks—plumbing, electrical, and HVAC—that keep your living environment functional, efficient, and safe. Trying to upgrade these systems later, after the walls are closed back up, is exponentially more expensive and invasive.
Consider a common scenario: a homeowner purchases a charming 1950s ranch and plans a modern open-concept living space. They pour their budget into high-end quartz finishes and imported light fixtures, but elect to leave the original galvanized steel water lines in place to save time. Within six months of project completion, a corroded main supply line behind the newly tiled master shower bursts, flooding the main floor and ruining $40,000 worth of new hardwood floors and custom cabinetry.
To avoid this nightmare, hire a licensed plumbing service to completely assess, strip out, and replace aging supply lines, supply risers, and soil pipes. Modernizing your distribution with modern materials like PEX or high-grade copper ensures optimal water pressure, eliminates the risk of pinhole leaks from internal mineral buildup, and brings drain-waste-vent systems up to contemporary building codes.
Along with updating your water supply, the home’s electrical capacity needs a major modern upgrade. Decades ago, a 100-amp electrical panel was more than sufficient to power a few lamps, a refrigerator, and a television. Today, between central heat pumps, induction cooktops, home offices, and modern high-draw appliances, older electrical panels are easily overloaded, creating potential fire hazards and frequent breaker trips.
Upgrading your main service panel to 200 amps or higher sets the stage for adding specialized, high-voltage circuits throughout the property. This is the ideal moment to run dedicated high-amperage wiring to the garage or carport for an ev charging station installation. By pulling these heavy gauge wires through open framing while the walls are bare, you save thousands in labor costs compared to fishing wires through finished drywall years down the line, fully preparing your residence for modern electric transport needs.
Executing Functional Layouts in High-Traffic Interior Spaces

With new plumbing, electrical, and HVAC infrastructure inspected and passed by local authorities, the project transitions into closing the walls and building out the functional interior layouts. Managing this phase requires balancing spatial flow, durable materials, and trade logistics. Because multiple specialty contractors will be working in the space simultaneously, having a detailed schedule keeps trades from stepping on each other’s toes or damaging newly completed work.
Coordinate trades in a strict logical sequence: insulation, drywall, priming, hard surface flooring, cabinetry, and trim work. Coordinating comprehensive home renovations involves managing lead times for fixtures and finishes so that materials arrive right when the space is ready for them. Staging materials safely prevents site clutter, which is a major cause of trip hazards and accidental damage on busy job sites.
When building out wet areas like kitchens and bathrooms, sequencing and specialized skill become even more critical. Bathrooms, in particular, demand strict adherence to waterproofing standards. Mold growth, rotting subfloors, and structural wood decay almost always stem from inadequate moisture barriers behind tiled walls and beneath shower pans.
Contracting a skilled bathroom remodeler guarantees that every moisture-prone area is engineered correctly from the studs out. Professional installers apply continuous liquid or sheet waterproofing membranes over cementitious backer boards, pitch shower pans accurately toward the drain, and ensure that custom glass enclosures are anchored into solid blocking behind the tile. Taking these precise technical steps ensures that your daily-use spaces remain hygienic, structurally sound, and beautiful for decades without developing hidden water leaks.
Installing Heavy Surfaces and Completing Outdoor Living Extensions
As the interior steps closer to completion, the focus shifts to installing high-touch surface materials and extending the overall liveability of your property into the outdoor areas. This stage requires heavy lifting, precise craftsmanship, and careful coordination to avoid damaging finished walls, floors, and surrounding landscaping.
Interior Heavy Material Integration
Installing large-format natural stone or engineered quartz in the kitchen or bath represents one of the most structurally demanding parts of the finishing phase. Natural stone slabs can weigh several hundred pounds, putting significant localized weight on your subfloor and cabinetry framing.
Prior to installation, cabinet boxes must be verified for exact levelness, plumb, and structural reinforcement. During a complex countertop installation, specialized installers must accurately measure, transport, seam, and anchor these heavy slabs. Proper edge support around sink cutouts, precise epoxy seaming, and secure anchoring to the base units prevent flexing, which could otherwise lead to cracked stone, broken cabinet faces, or dangerous displacement.
Exterior Surface Upgrades and Leisure Areas
With interior heavy surfaces set, you can safely direct your attention out into the yard. A true whole-house transformation does not stop at the exterior walls; it connects the main house with functional outdoor living spaces, patios, and water features.
- Ensure all underground utility runs for outdoor kitchen gas lines, pool pumps, and patio drainage are fully mapped before heavy equipment enters the backyard.
- Hire experienced pool remodeling services to address aging concrete shells, fix leaking underground pipe connections, and update surrounding coping stones.
- Modernize filtration and heating systems to cut down on long-term energy consumption and maintenance time.
- Seamlessly connect new pool decking with interior main-level flooring transitions to build a cohesive, resort-style indoor-outdoor living area.
Final Inspections and Preparing for Everyday Life
The final stretch of a complete home transformation is all about verification, fine-tuning, and safely preparing the space for daily family life. Before you move furniture into your newly updated home, a comprehensive walkthrough with your primary contractor is essential. This is your opportunity to test every system, inspect every seam, and compile a final punch list of minor adjustments, touch-ups, or hardware alignments.
Verify that all local building permits are officially signed off by city inspectors. Ensure that electrical panels are clearly and accurately labeled, shutoff valves for plumbing fixtures are easily accessible, and HVAC filters are fresh and clean following construction. Hire a professional post-construction cleaning crew to perform a deep, HEPA-vacuum cleaning across all surfaces, ductwork openings, and cabinet interiors to eliminate any remaining fine construction dust.
Taking a structured, safety-first approach to a whole-house renovation requires time, patience, and a willingness to invest in the critical systems behind the walls. By respecting the logical sequence of construction—addressing site hazards first, securing the exterior shell, upgrading core utilities, and relying on certified trade professionals for heavy technical finishes—you convert a complex construction project into a smooth, rewarding journey. The end result is a structurally sound, highly efficient, and tailored sanctuary that will safely support your lifestyle for generations to come.